Postの投稿フォームのページ作成と、そのページからリクエストを受け取り、データベースに保存をしていきます。
親記事
Dockerで環境構築して Laravel 9で CRUD 機能を作る
2022年03月15日
Laravel前記事
Laravel 9 投稿CRUD 機能を作成する〜 投稿リスト
2023年01月10日
Laravel環境
- macOS
- Laravel v9.0.2
- Docker 20.10.12
投稿ページ
PostController の create メソッドで投稿ページを表示させます。
投稿ページへは投稿一覧ページのPost ボタンから遷移できます。
public function create()
{
     return view('posts.create');
}
投稿ページ resources/views/posts/create.blade.php ファイルを作成します。
<x-app-layout>
     <x-slot name="header">
          <h2 class="font-semibold text-xl text-gray-800 leading-tight">
               {{ __('Create') }}
          </h2>
     </x-slot>

     <div class="py-12">
          <div class="max-w-7xl mx-auto sm:px-6 lg:px-8">

               <form action="{{ route('posts.create') }}" method="POST">
                    @csrf
                    <div class="bg-white shadow-sm sm:rounded-lg mb-10">
                         <div class="p-6 flex items-center ">
                              <button type="submit" class="rounded bg-blue-400 text-white py-2 px-3">{{ __('Submit') }}</button>
                         </div>
                    </div>
                    <div class="bg-white shadow-sm sm:rounded-lg flex flex-col items-center p-6">
                         <input type="text" class="px-4 my-5 border shadow rounded w-3/4" name="title" placeholder="title" required value="">

                         <input type="hidden" value="{{ auth()->id() }}" name="user_id">

                         <textarea name="content" class="p-4 my-1 border shadow rounded w-3/4" id="" cols="30" rows="10" required></textarea>

                    </div>
               </form>
          </div>

     </div>
</x-app-layout>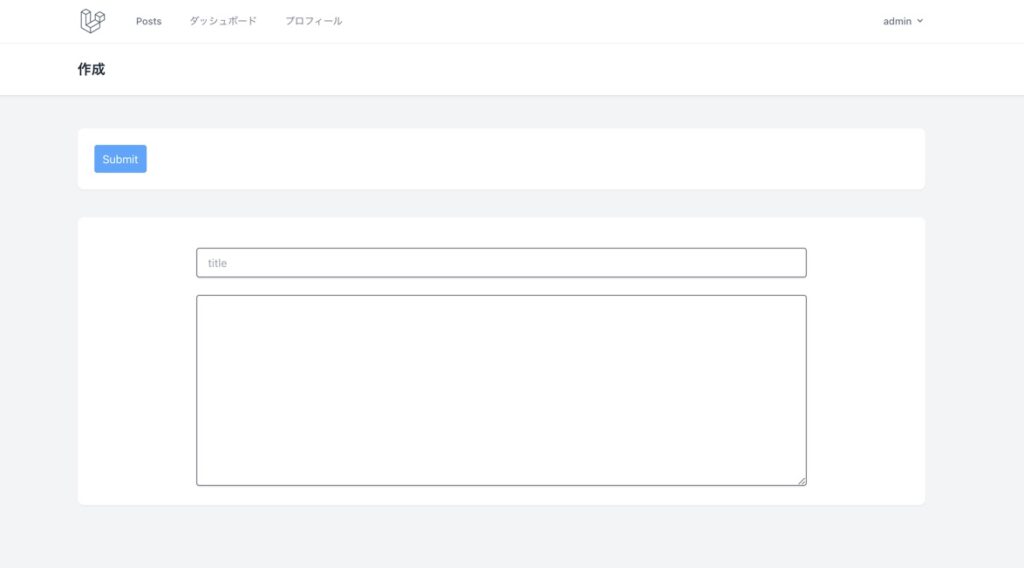
バリデーション
フォームから送られた値は、 PostControllerのstore メソッドでバリデーションと保存を行います。バリデーションに引っかかると、エラーオブジェクトを持ってユーザーを直前の場所へ自動的にリダイレクトします。
use Illuminate\Validation\Rule;

public function store(Request $request)
{
     $data = $request->validate([
          'title' => ['required', 'string', 'max:100'],
          'content' => ['required', 'string', 'max:400'],
          'user_id' => ['integer', Rule::exists('users', 'id')]
     ]);

     Post::create($data);
     return redirect()->route('posts')->with('status', '投稿完了');
}
エラーメッセージ
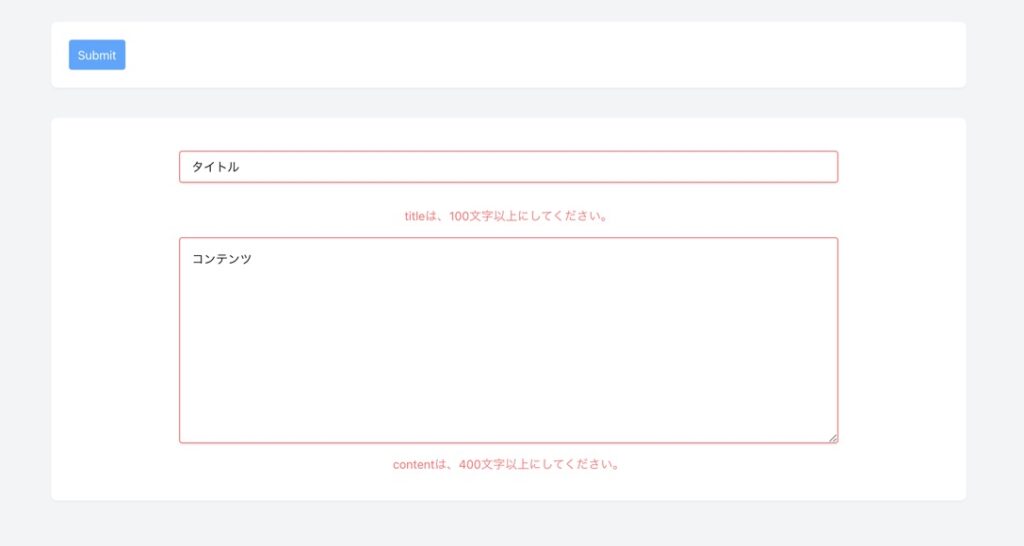
バリデーションに引っかかったときに持ち帰ってくるエラーオブジェクトを使って、投稿ページにエラーメッセージを表示させます。
<div class="bg-white shadow-sm sm:rounded-lg flex flex-col items-center p-6">
     <input type="text" class="px-4 my-5 border shadow rounded w-3/4 @error('title') border-red-400 @endif" name="title" placeholder="title" required value="{{ old('title') }}">
     @error('title')
     <span class="text-red-400 my-3">
          {{$message}}
     </span>
     @endif
     <input type="hidden" value="{{ auth()->id() }}" name="user_id">

     <textarea name="content" class="p-4 my-1 border shadow rounded w-3/4 @error('content') border-red-400 @endif" id="" cols="30" rows="10" required>{{ old('content') }}</textarea>

     @error('content')
     <span class="text-red-400 my-3">
          {{$message}}
     </span>
     @endif
</div>
@error ディレクティブ に特定の属性を指定して、エラーメッセージが存在するか判断し、$message のエラーメッセージを表示させます。
oldメソッド はエラーになった際の値を保持します。
11: データを保存
12: with(‘status’, ‘投稿完了’) メッセージをフラッシュデータとしてセッションに保存して、投稿一覧ページにリダイレクトさせます。
フラッシュデータ
投稿が完了したあとに投稿一覧ページでフラッシュデータを使ってメッセージを表示させます。
<div class="bg-white shadow-sm sm:rounded-lg mb-10">
     <div class="p-6 flex items-center ">
          <a href="{{ route('posts.create') }}">
               <button class="rounded bg-green-400 text-white py-2 px-3">Post</button>
          </a>
          @if (session('status'))
          <div class="text-blue-400 ml-auto">
               {{ session('status') }}
          </div>
          @endif
     </div>
</div>
セッションデータはすぐに削除されます。
割り当て
public $guarded = ['id', 'created_at'];
create() でデータを保存する場合、セキュリティ上の都合で予め使うフィールドを割り当てる必要があります。
- fillable = [‘title’] → 指定した属性を使用。
- guarded = [‘id’] → 指定した属性以外を使用。
今回は id とcreated_at は自動で入力されるので、guarded でid と created_atを指定します。
これで投稿ができる状態になりました。
次の記事
Laravel9 投稿 CRUD機能を作成 〜 投稿を表示
2023年01月10日
Laravel
