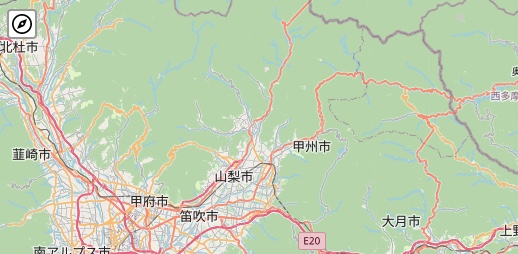
React Leaflet は、React.js フレームワークと Leaflet ライブラリを組み合わせた地図コンポーネントの作成を容易にするためのライブラリです。この記事では、マップ上にボタンを作成して、クリックすると端末の位置情報を元に、現在の位置に移動してマーカーを追加する方法を確認します。
パッケージのインストールとフォルダ構成
アプリを作成します。
npx create-react-appパッケージをインストールします、leaflet と react-leaflet を使用します。
npm install leaflet react-leafletファイル構成
|-- public//
|    `-- location.svg
`-- src //
    |-- index.js
    |-- index.css
    |-- App.css
    |-- App.js
    `-- conponents //
        `-- button.js
React Leaflet マップ表示とレイヤーコントロール
2023年06月06日
leaflet現在の位置を取得して移動するボタンを作成する

左上のような見た目の、現在の位置へ移動するボタンをマップ上に作成していきます。
import {
  MapContainer,
  TileLayer,
} from "react-leaflet";
import "leaflet/dist/leaflet.css";
import L from "leaflet";
import "./App.css";
import Button from "./components/button";
import icon from "leaflet/dist/images/marker-icon.png";
import iconShadow from "leaflet/dist/images/marker-shadow.png";

//defaultMarker
delete L.Icon.Default.prototype._getIconUrl;
L.Icon.Default.mergeOptions({
  iconUrl: icon,
  shadowUrl: iconShadow,
});

const center = [35.3628, 138.7307];

function App() {
  return (
    <MapContainer center={center} zoom={10} zoomControl={false} id="map">
      <TileLayer
        attribution='© <a href="http://www.openstreetmap.org/copyright">OpenStreetMap</a>'
        url="https://{s}.tile.openstreetmap.org/{z}/{x}/{y}.png"
      />
      <Button position="topleft" />
    </MapContainer>
  );
}

export default App;
8, 28: <Button /> コンポーネントをインポートして、表示位置をここで指定するためにposition props を指定して表示させます。
import { useMap } from "react-leaflet";
import L from "leaflet";

function Button({ position }) {
  const map = useMap();
  const customButton = L.Control.extend({
    options: {
      position: position,
    },
    onAdd: function () {
      const button = L.DomUtil.create(
        "button",
        "leaflet-bar leaflet-control leaflet-control-custom"
      );
      button.innerHTML = "<img src='/location.svg' class='currentPosition' />";
      button.className = "customButton";

      button.onclick = function () {
        if (navigator.geolocation) {
          navigator.geolocation.getCurrentPosition(
            (location) => {
              map.setView(
                [location.coords.latitude, location.coords.longitude],
                14
              );

              L.marker([location.coords.latitude, location.coords.longitude])
                .bindPopup("イマココ")
                .addTo(map);
            },
            (err) => {
              console.log(err);
            }
          );
        } else {
          console.log("ブラウザが対応していません");
        }
      };

      return button;
    },
  });

  map.addControl(new customButton());
}
export default Button;
8: position props を使用して、ボタンの表示位置を指定します。位置指定は以下の4パターンあります。
| topleft | 左上 |
| topright | 右上 |
| bottomleft | 左下 |
| bottomright | 右下 |
11 ~ 16: マップ上に表示するボタンの見た目を作成します。public 配下にある location.svg を使用しています。
20: 端末の現在位置を取得します。
22 ~ 25: 現在の位置が取得できたら、位置情報を元にマップを移動、ズームします。setView メソッドの第一引数に 座標、第二引数に ズームレベルを指定します。
27 ~ 29: 現在の位置にマーカーを追加します。
以上現在の位置を取得して移動するボタンを作成する方法です。


