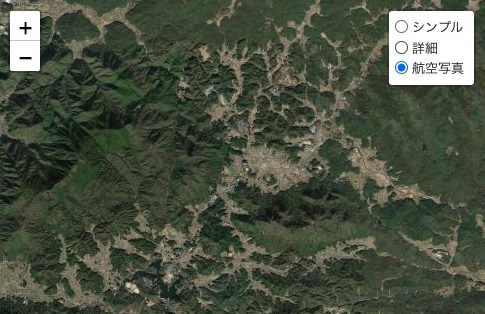
React Leaflet は、React.js フレームワークと Leaflet ライブラリを組み合わせた地図コンポーネントの作成を容易にするためのライブラリです。この記事では、React Leaflet を使ってマップと、レイヤーを切り替えるためのレイヤーコントロールを表示させる方法を確認します。
パッケージのインストールとフォルダ構成
アプリを作成します。
npx create-react-appパッケージをインストールします、leaflet と react-leaflet を使用します。
npm install leaflet react-leafletファイル構成
src //
|-- index.js
|-- index.css
|-- App.css
`-- App.js
マップとレイヤーコントロールを表示
マップを表示して、右上のレイヤーコントロールでレイヤーの切り替えができるようにしていきます。

import {
  MapContainer,
  TileLayer,
  LayersControl,
} from "react-leaflet";
import "leaflet/dist/leaflet.css";
import "./App.css";


function App() {
  const center = [35.3628, 138.7307];
  return (
    <MapContainer
      center={center}
      zoom={10}
      zoomControl={true}
      scrollWheelZoom={true}
      id="map"
    >
      <LayersControl position="topright">
        <LayersControl.BaseLayer checked name="シンプル">
          <TileLayer
            attribution='© <a href="http://www.openstreetmap.org/copyright">OpenStreetMap</a>'
            url="https://{s}.tile.openstreetmap.org/{z}/{x}/{y}.png"
          />
        </LayersControl.BaseLayer>
        <LayersControl.BaseLayer name="詳細">
          <TileLayer
            attribution="<a href='https://maps.gsi.go.jp/development/ichiran.html' target='_blank'>国土地理院</a>"
            url="https://cyberjapandata.gsi.go.jp/xyz/pale/{z}/{x}/{y}.png"
          />
        </LayersControl.BaseLayer>
        <LayersControl.BaseLayer name="航空写真">
          <TileLayer
            attribution="Tiles © Esri — Source: Esri, i-cubed, USDA, USGS, AEX, GeoEye, Getmapping, Aerogrid, IGN, IGP, UPR-EGP, and the GIS User Community"
            url="https://server.arcgisonline.com/ArcGIS/rest/services/World_Imagery/MapServer/tile/{z}/{y}/{x}"
          />
        </LayersControl.BaseLayer>
      </LayersControl>
    </MapContainer>
  );
}

export default App;
13-19, 40: <MapContainer /> コンポーネントで使用できる Props 使用している Props
| center | マップの中心 |
| zoom | 初期ズームレベル |
| zoomControl | 左上のズームコントロール |
| scrollWheelZoom | ホイールでズーム可否 |
| id | css でマップの大きさを指定するためのもの |
#map {
    width: 100vw;
    height: 100vh;
}
20: <LayerControl > を表示させる場所。
| topleft | 左上 |
| topright | 右上 |
| bottomleft | 左下 |
| bottomright | 右下 |
21: <LayersControl.BaseLayer> コントロールしたい <TileLayer > を指定します。初期レイヤーには、 checked をつけます。
<TileLayer> タイルレイヤーを指定します。レイヤーリスト、気象庁のレイヤー
以上です。


