- サンプル
- 完成画像を確認
- 完成コード
- コードの解説
サンプル
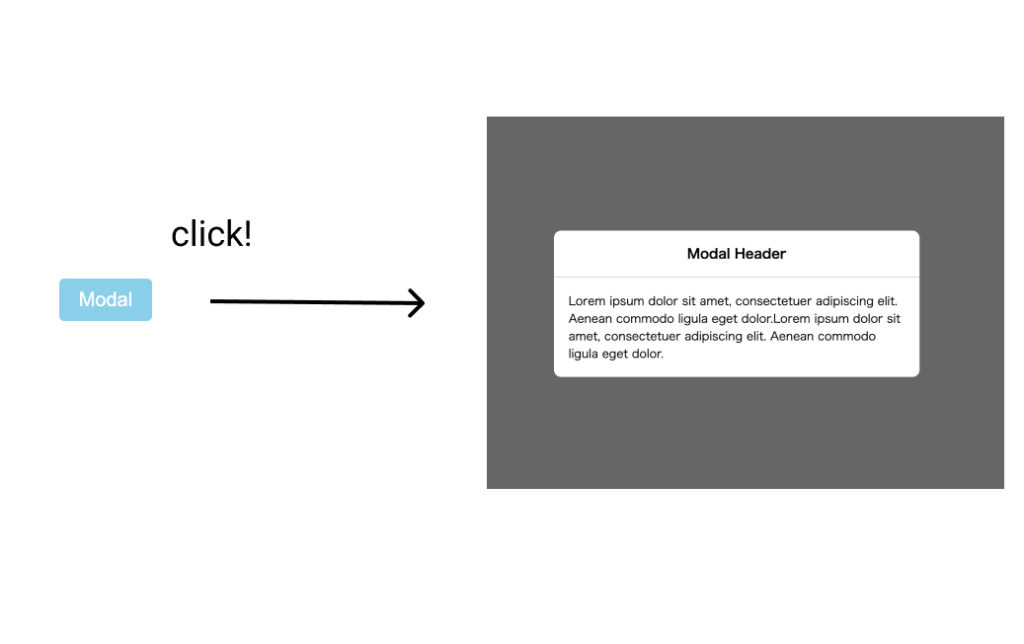
完成画像を確認

<!DOCTYPE html>
<html lang="en">
<head>
     <meta charset="UTF-8">
     <meta name="viewport" content="width=device-width, initial-scale=1.0">
     <link rel="stylesheet" href="style.css">
     <title>listmodal</title>
</head>
<body>

     <div class="overlay">
          <div class="modal">
               <div class="modal-header">
                    <p>Modal Header</p>
               </div>
               <div class="modal-content">
                    <p>Lorem ipsum dolor sit amet, consectetuer adipiscing elit. Aenean commodo ligula eget dolor.Lorem ipsum dolor sit amet, consectetuer adipiscing elit. Aenean commodo ligula eget dolor.</p>
               </div>
          </div>
     </div>

     <div class="wrapper">
          <button class="btn">Modal</button>
     </div>

     <script src="script.js"></script>
</body>
</html>
* {
margin: 0;
padding: 0;
box-sizing: border-box;
}
.wrapper {
display: flex;
justify-content: center;
align-items: center;
width: 100%;
height: 100vh;
}
.wrapper button {
padding: 10px 20px;
background: skyblue;
color: white;
border-radius: 5px;
font-size: 20px;
border: none;
cursor: pointer;
}
.overlay {
width: 100%;
height: 100%;
position: fixed;
top: 0;
left: 0;
background: rgba(0,0,0,0.6);
opacity: 0;
pointer-events: none;
transition: 0.25s ease-out;
display: flex;
justify-content: center;
align-items: center;
}
.overlay.show {
opacity: 1;
pointer-events: all;
}
.modal {
display: flex;
flex-direction: column;
background: #fff;
border-radius: 10px;
width: 500px;
}
.modal-small {
width: 300px!important;
}
.modal-large {
width: 800px!important;
}
.modal-header {
padding: 18px 0;
width: 100%;
border-bottom: 1px solid #ccc;
text-align: center;
}
.modal-header p {
font-size: 18px;
font-weight: 600;
}
.modal-content {
padding: 20px;
width: 100%;
}const overlay = document.querySelector('.overlay');
const btn = document.querySelector('.btn');
btn.addEventListener('click', function () {
if (overlay.classList.contains('show') === false) {
overlay.classList.add('show');
}
});
overlay.addEventListener('click', function () {
if (overlay.classList.contains('show')) {
overlay.classList.remove('show');
}
});コードの解説
まずはモーダルが表示されている状態を作っていく
.overlay {
width: 100%;
height: 100%;
position: fixed;
top: 0;
left: 0;
background: rgba(0,0,0,0.6);
pointer-events: none;
display: flex;
justify-content: center;
align-items: center;
}
.modal {
display: flex;
flex-direction: column;
background: #fff;
border-radius: 10px;
width: 500px;
}
.modal-header {
padding: 18px 0;
width: 100%;
border-bottom: 1px solid #ccc;
text-align: center;
}
.modal-header p {
font-size: 18px;
font-weight: 600;
}
.modal-content {
padding: 20px;
width: 100%;
}通常は非表示で、showクラスを付与された場合に今の状態にしたいので、opacity: 0; そして、非表示中にクリックイベントをさせたくないので、pointer-events: none;を指定する。
showクラスを付与された場合には今の状態にしたいので、overlayクラスにshowクラスが付与された場合のCSSを追加すると以下のようになる。
.overlay {
width: 100%;
height: 100%;
position: fixed;
top: 0;
left: 0;
background: rgba(0,0,0,0.6);
opacity: 0;
pointer-events: none;
transition: 0.25s ease-out;
display: flex;
justify-content: center;
align-items: center;
}
.overlay.show {
opacity: 1;
pointer-events: all;
}10行目のtransitionはopacityが0から1へと変化する時間遷移を表している。
JavaScriptで何々をクリックした際にshowクラスを付与または、削除する。といったイベントを登録していく
const overlay = document.querySelector('.overlay');
const btn = document.querySelector('.btn');

btn.addEventListener('click', function () {
     if (overlay.classList.contains('show') === false) {
          overlay.classList.add('show');
     }
});

overlay.addEventListener('click', function () {
     if (overlay.classList.contains('show')) {
          overlay.classList.remove('show');
     }
});4〜8btnクラスをクリックしたとき、overlayクラスにshowクラスが付与していない場合にshowクラスを付与する。
10〜14overlayクラスをクリックしたとき、overlayクラスにshowクラスが付与している場合に、showクラスを除去する。
overlayが表示された状態の時、CSSの17行目pointer-events: all;を指定し直さないとクリックイベントが効かないので注意する。
モーダルの大きさを指定する
.modal-small {
     width: 300px!important;
}

.modal-large {
     width: 800px!important;
}
modalクラスに上記のクラスを追加することで、モーダルの大きさを変えることができる。
関連記事
JavaScriptイメージモーダル(画像拡大表示)を作ろう
2023年01月10日
JavaScript


